 Free installation of free SSL certificate
Sophisticated network traffic analyzers are powerful and dangerous tools in hands of a malicious spammer. Stealing plain text passwords sent over the internet, email addresses, credit card numbers, date of birth, ID card numbers etc. - all this stuff can be with certain effort and technical knowledge collected into database and misused. Even though most of web site developers are aware of this fact, the number of web sites being set up insecurely is astonishingly high.
SSL certificates play important role in securing your website by encrypting all transferred contents between server and browser. There is almost no way a spammer could decypher TCP/IP packets and steal credit card numbers or anything. Unfortunatelly, SSL certificates are not for free and paying yearly 80-120 USD for non-profitable sites simply throws security aspects far behind. Luckilly, one certification authority is an exception - StartCom Ltd.. These guys will give you valid SSL certificate for free.
This article provides short tutorial on how to obtain and install free SSL certificate by certification authority StartCom Ltd. at your web site. The certificate is of class 1, valid for 1 year and is recognized in all major browsers. Class 1 means lowest level out of 3 classes. Certificate is issued only for 1 single domain + 1 subdomain, e.g. mysite.com and www.mysite.com.
Steps to obtain free SSL certificate Class 1
- sign-up at StartCom Ltd. and obtain your membership personal authentication certificate
- verify your website domain (TLD)
- create your certificate:
- generate your private key (certificate.key)
- OPTION 1: via OpenSSL utility
- OPTION 2: directly at StartCom via Certificate Wizard
- [optional] remove passphrase from private key
- [optional] create certificate signing request (CSR) (certificate.csr)
- create public key (certificate.crt)
- fetch certificate authority chain (CA Certificate)
- install private key, public key and certificate chain at your web server (web hosting)
Step 1 - Sign up at StartCom Ltd.
Sign-up at https://www.startssl.com/?app=12.
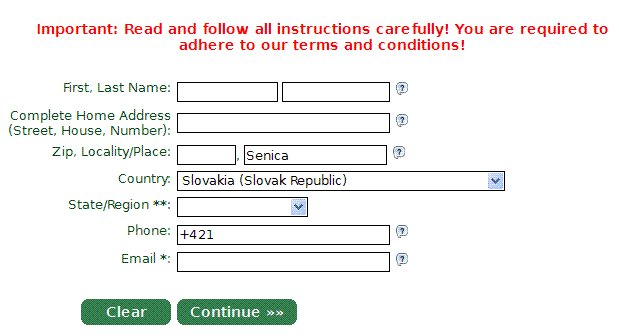
A few basic personal information is required by you. You should provide truthfull information, or your membership request might be rejected. Your application will be checked by a StartCom's employee and approved within 6 hours from your sign-up request.
Once approved, you will receive your FREE Certificate Member certificate (*.p12) which must be imported into your browser.
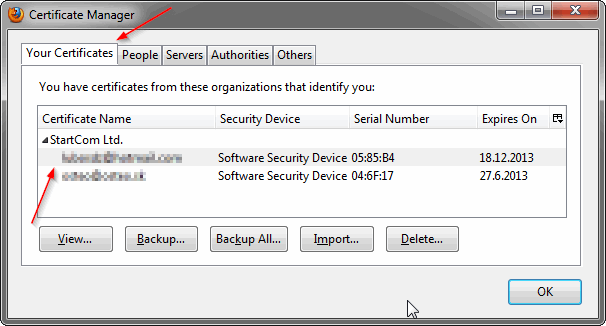
Once imported succesfully, you can access your personal area at http://www.startssl.com and continue with validation process.
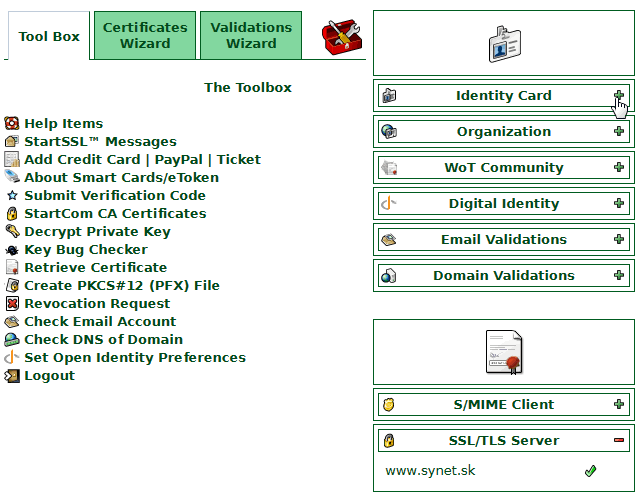
Step 2 - Verify your website domain
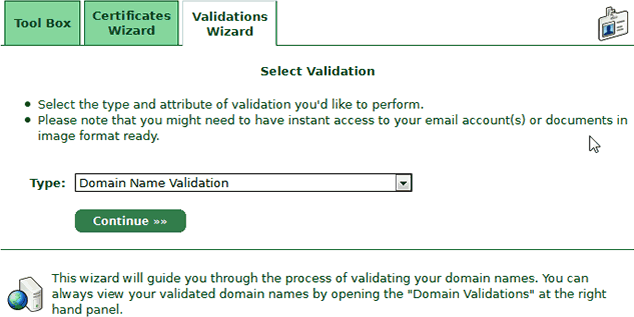
Depending on the purpose of your certificate, StartCom provides couple of ways of validation. In our case, we want to obtain a domain SSL certificate - therefore we will validate the existence of the web domain, where certificate will be installed - in this example "synet.sk". Go to Validations Wizard and request domain validation:
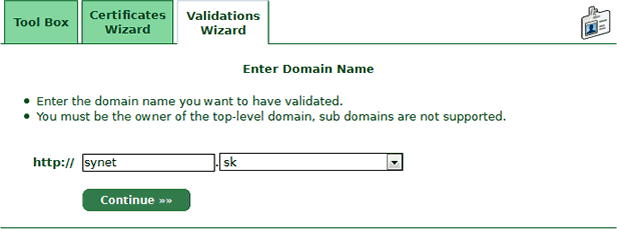
One subdomain will be entered later (e.g. www.synet.sk):
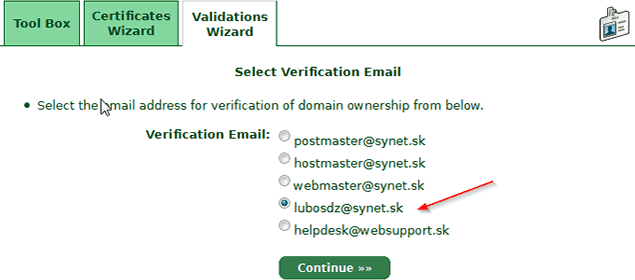
StartCom only allows validation via few pre-defined typical email addresses or your previously validated email address at validated domain.
You are not allowed to enter arbitrary email address.
If neither of suggested email addresses suits you, you can either validate other email of your own or create email alias at your hosting.
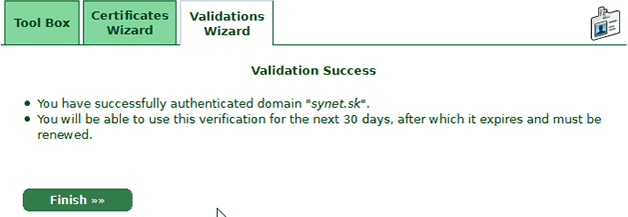
Now you will receive short email with unique validation code that you must enter into textfield:
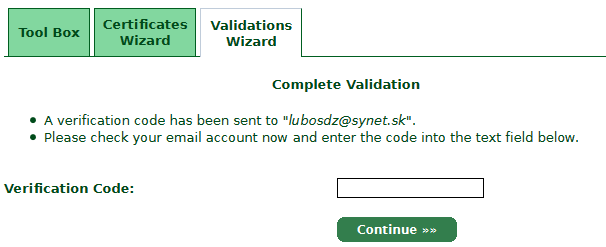
This ends process of domain validation and we can continue with creating the certificate - private key and public certificate.
Step 3 - Generate your private key (*.key)
Now we will create a private key, from which we will later generate certificate signing request (CSR) and server's public key. The workflow goes as follows:
PRIVATE KEY -> CSR REQUEST (only OPTION 1) -> PUBLIC KEY
Go into section Certificate Wizard and select Web Server SSL/TLS Certificate:
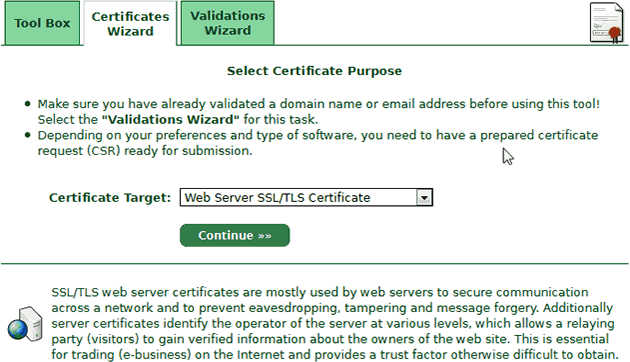
There are two ways of creating your private key:
- OPTION 1: you can create it via installing OpenSSL utility»
- OPTION 2: or you can create it directly via StartCom Certificate Wizard
OPTION 1 - Creating private key via OpenSSL utility:
Go for this option, if you plan to re-use StartCom certificates also in next years or if you like playing around with more advanced stuff. You can create your own private key via following OpenSSL commands:
openssl genrsa -des3 -out private/synet.key 2048
This will write into directory "private/synet.key" private key with key of length 2048 bytes. You will be asked to enter few necessary details (common name, city, company unit etc.) and a passphrase for manipulation - so remember it.
Creating a private key via OpenSSL makes sense only if you create also certificate signing request (CSR) that will be uploaded to StartCom. Once private key created, create CSR with following OpenSSL command:
openssl req -new -key private/synet.key -out synet.csr
This will create CSR into file synet.csr.
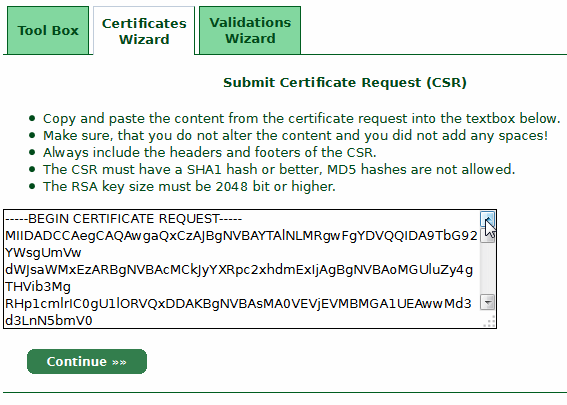
Now back at StartCom - in the section "Generate Private Key" choose "SKIP" - you will be redirected to a page where insert your CSR. Now you can copy & paste the synet.csr content into StartCom Certificate wizard. At this point you have everything needed to generate a public key - continue with STEP 4 - Create public key (*.crt).
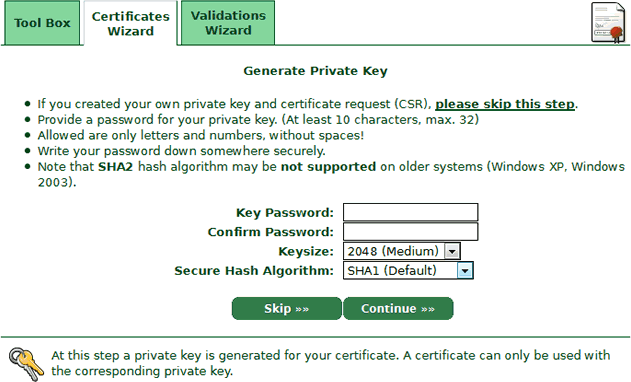
OPTION 2 - Creating private key via Certificate Wizard
If you will not generate private key via OpenSSL utility, StartCom can generate it for you. Since you have already provided all necessary personal information via sign-up form, you don't need to enter any certificate details (unlike OPTION 1). StartCom will directly create private key for you and generation of CSR is not needed.
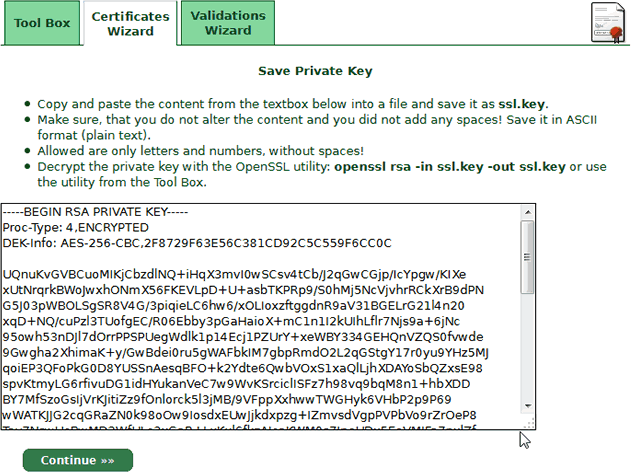
Step 4 - Create public key (*.crt)
We are just a few clicks away from obtaining public key - select for which validated domain you want to obtain certificate ...

... specify one subdomain (e.g. www or mysubdomain) ..
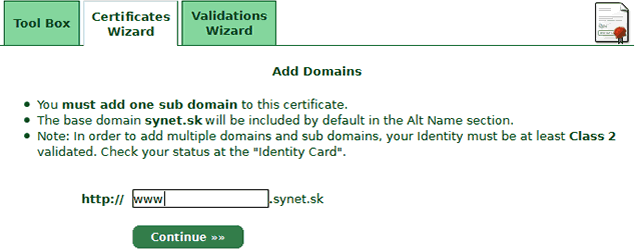
.. and - heureka - here's our public key:
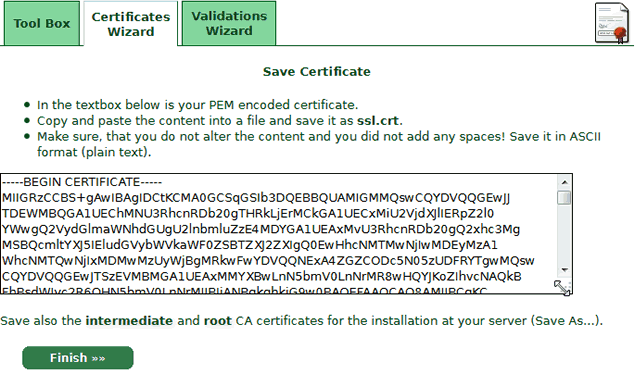
Step 5 - Fetch Certificate Authority Chain (CA Certificate)
Even if you have everything done correctly by now, your private and public keys will not be valid unless you set up correct certificate hierarchy - called also certificate chain. This means, that browser while connecting to your server will need to understand the relation between your certificate and the CA authority which issued your certificate.
If browser would not determine by comparing public CA keys with your installed certificate that they match, it will complain and warn you that certificate could not be verified and is not trusted. Public keys of most important world certification authorities are installed directly into browsers - so each browser has its own database of trusted public keys of certification authorities. StartCom is luckilly recognized in all browsers except for older versions of Internet Explorer.
Download StartCom authority intermediate certificate from here:
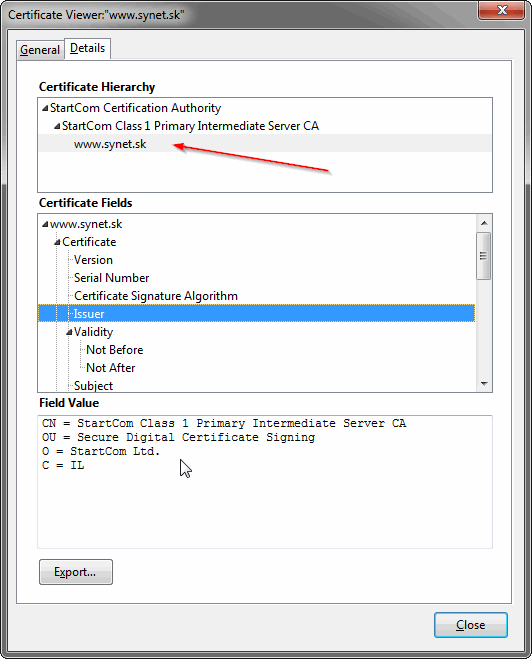
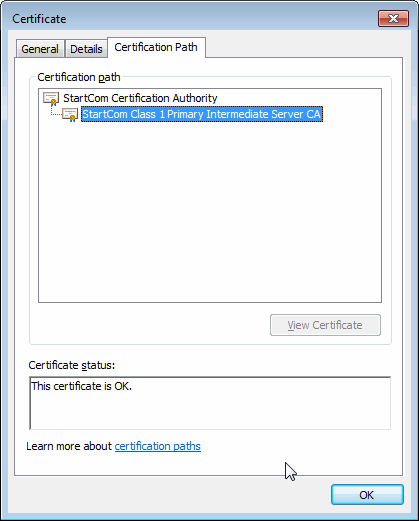
Tip: If your operating system cannot open intermediate certificate, try to change file extension from PEM to CRT or CER. This should work at least for windows - you should be able to see certificate chain:
Step 6 - Install the certificate at your web server (Websupport.sk)
Most of web hosting companies require extra fees 10 - 35 EUR for installing SSL certificate for your domain. It's understandable since they must install it manually.
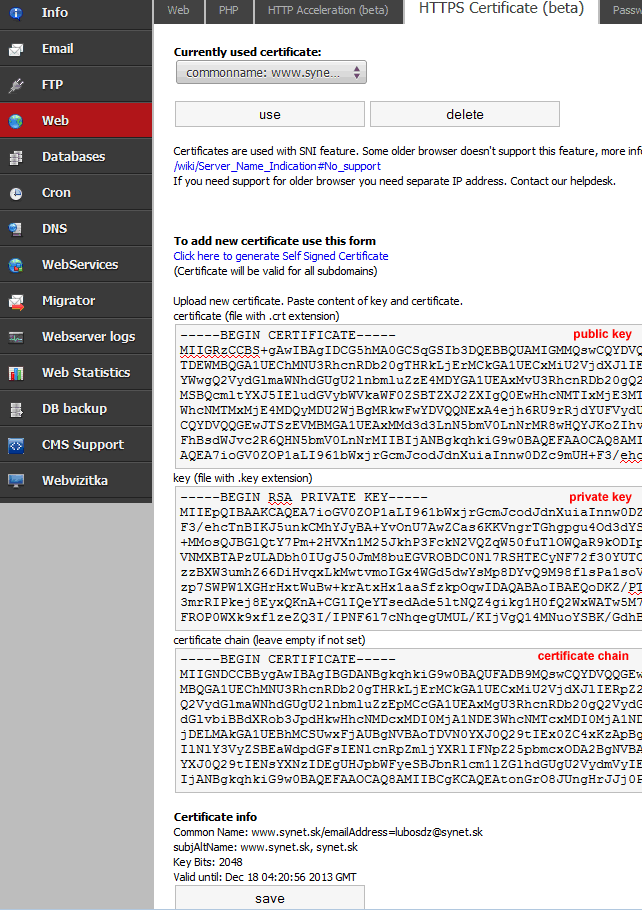
Luckilly, hosting company Websupport.sk developed it's own solution, which enables self-installation of SSL certificates via administrative web panel - therefore it's for free.
Installing is pretty straightforward - insert private key, public key and certificate chain into fields and click SAVE:
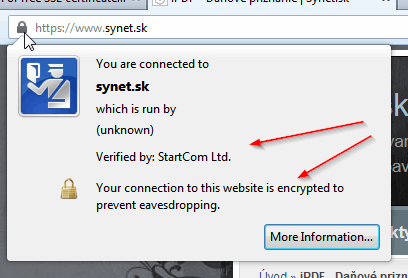
Now you can check it - go to your site, switch to https connection and investigate newly installed certificate:
Check also correct certificate hierarchy (certificate chain):
